Image Projections and the Radon Transform
The basic problem of tomography is given a set of 1-D projections and
the angles at which these projections were taken, how do we recontruct
the 2-D image from which these projections were taken? The first
thing we did was to look at the nature of the projecitons.
Fig(1) -
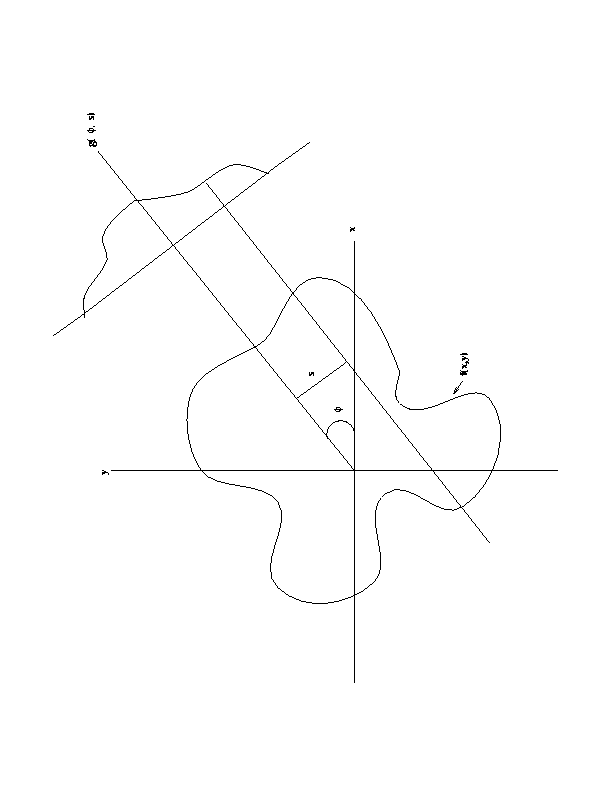
Define g(phi,s) as a 1-D projection at an angle  . g(phi,s) is the line
integral of the image intensity, f(x,y), along a line l that is
distance s from the origin and at angle phi off the x-axis.
. g(phi,s) is the line
integral of the image intensity, f(x,y), along a line l that is
distance s from the origin and at angle phi off the x-axis.
| Eqn(1) |
 |
All points on this line satisfy the equation :
x*sin(phi) - y*cos(phi) = s
Therefore, the projection function g(phi,s) can be rewritten as
| Eqn(2) |
 |
The collection of these g(phi,s) at all phi is called the Radon Transform of
image f(x,y).
To be able to study different reconstruction techniques, we first
needed to write a (MATLAB) program that took projections of a known
image. Having the original image along with the projections gives us
some idea of how well our algorithm performs. The projection code is
pretty simple. Basically, we take the image (which is just a matrix
of intensities in MATLAB), rotate it, and sum up the intensities. In
MATLAB this is easily accomplished with the 'imrotate' and 'sum'
commands. First, we zero pad the image so we don't lose anything when
we rotate (the images are rectangular so the distance across the
diagonal is longer than the distance on a side). Then we rotate the
image 90-phi degrees (so that the projection is lined up in the columns)
using the 'imrotate' command, and finally summed up the columns using
the 'sum' command.
The performance of this program was marginal. We did not bother
optimizing the code for MATLAB because our main focus was
reconstructing the images, not taking projections of them.
Filtered Backprojection and the Fourier Slice Theorem
In order to reconstruct the images, we used what is known as the
Fourier Slice Theorem. The Slice Theorem tells us that the 1D Fourier
Transform of the projection function g(phi,s) is equal to the 2D Fourier
Transform of the image evaluated on the line that the projection was
taken on (the line that g(phi,0) was calculated from). So now that we
know what the 2D Fourier Transform of the image looks like (or at
least what it looks like on certain lines and then interpolate), we
can simply take the 2D inverse Fourier Transform and have our original
image.
Fig. 2 -
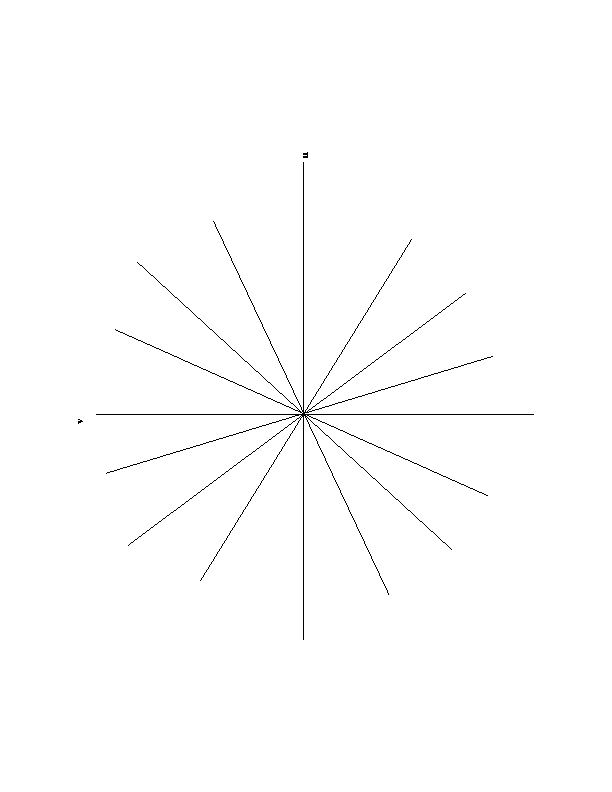
We can show the Fourier Slice Theorem in the following way:
The 1D Fourier Transform of g is given by :
| Eqn(3) |
 |
Now, we subsitute our expression for g(phi,s) (Eqn. 2) into the
expression above to get
| Eqn(4) |
 |
We can use the sifting property of the Dirac delta function to
simplify to
| Eqn(5) |
 |
Now, if we recall the definition of the 2D Fourier Transform of f
| Eqn(6) |
 |
we can see that that Eqn 5. is just F(u,v) evaluated at u = w*sin(phi)
and v = -w*cos(phi), which is the line that the projection g(phi,s) was
taken on!
Now that we have shown the Fourier Slice Theorem, we can continue
with the math to gain further insight. First, recall the definition
for the 2D inverse Fourier Transform
| Eqn(7) |
 |
Now, we make a change of variable from rectangular to polar
coordinates and replace F(phi,w) with G(phi,w) we get
| Eqn(8) |
 |
where |w| is the determinant of the Jacobian of the change of variable
from rectangular to polar coordinates. We now have a relationship
between the projection functions and the image we are trying to
recontruct, so we can easily write a program to do the reconstruction.
Notice that we have to multiply our projections by |w| in the Fourier
domain. This product
| Eqn(9) |
 |
is called the filtered back projection at angle phi. If we look at
Fig. 2, we can see that we have a lot of information at low
frequencies (near the origin), and not as much at high frequencies.
The |w|, which is a ramp filter, compensates for this.
Below, we show our phantom object reconstructed from 1, 4, 8, 15, and
60 filtered back projections.
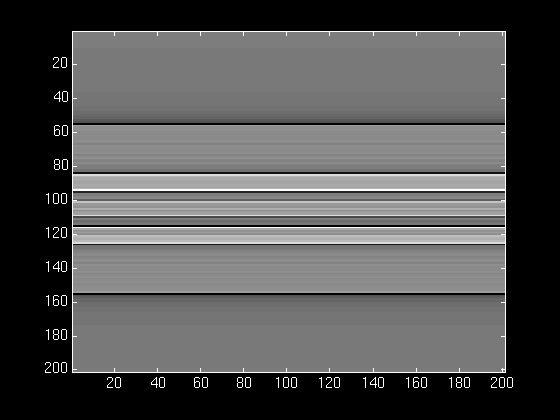
With only one back projection, not much information about the original
image is revealed.
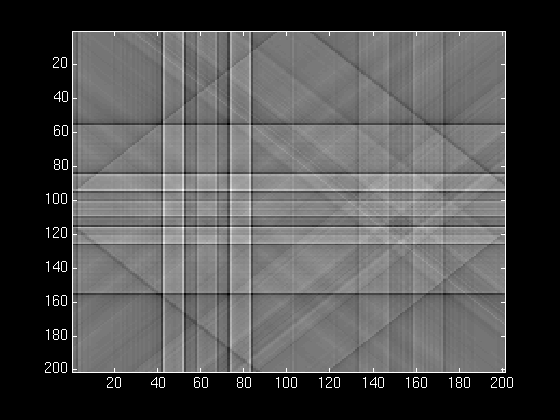
With 4 back projections, we can see some of the basic features start
to emerge. The two squares on the left side start to come in, and the
main ellise looks like a diamond.
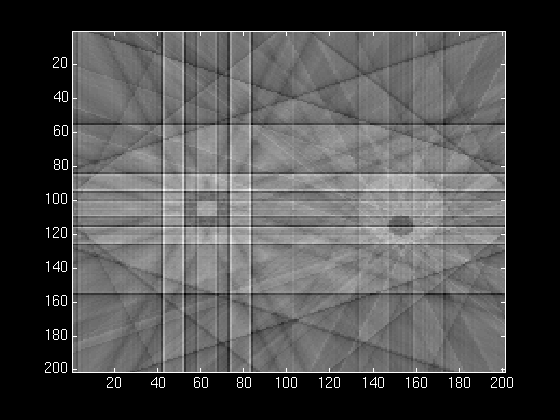
At 8 back projections, our image is finally starting to take shape.
We can see the squares and the circles well, and we can make out the
basic shape of the main ellipse.

With 15 back projections, we can see the bounds of the main ellipse
very well, and the squares and cirlces are well defined. The lines in
the center of the ellipse appear as blurry triangles. Also, we have a
lot of undesired residuals in the back ground (outside the main
ellipse).
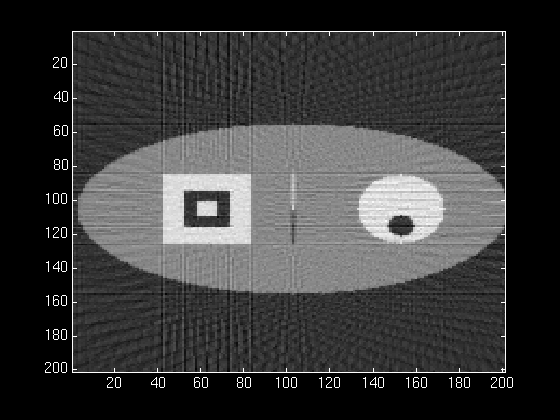
At 60 back projections, our reconstructed image looks very nice. We
still have some patterns outside the ellipse, and there are streaks
from the edge of the squares all the way out to the edge of the
image. These appear because the edge of the square is such a sharp
transistion at 0 and 90 degrees, that when we pass the projections
through the ramp filter, there are sharp spikes in the filtered
projections. These never quite seem to get smoothed out.
The MATLAB code for
the filtered back projections worked very nicely. The basic algorithm
we used for filtered back projections was :
f(x,y) is the image we are trying to recontruct, q(phi,s) is the
filtered back projection at angle phi.
Initialize f(x,y)
For each p do
For each (x,y) do
Find the contributing spot in the filtered back projection
that corresponds to (x,y) at angle phi, in other words
s = xsin(phi) - ycos(phi)
f(x,y) = f(x,y) + q(phi,s);
end
end
Since we used MATLAB to do all the image processing, we were able to
vectorize the computations, and cut out the entire inner loop (which
is really 2 loops, one for x and one for y). The run times were
blazingly fast, our algorithm took about .2 seconds per back
projection on our phantom when running on a SPARC 5.
