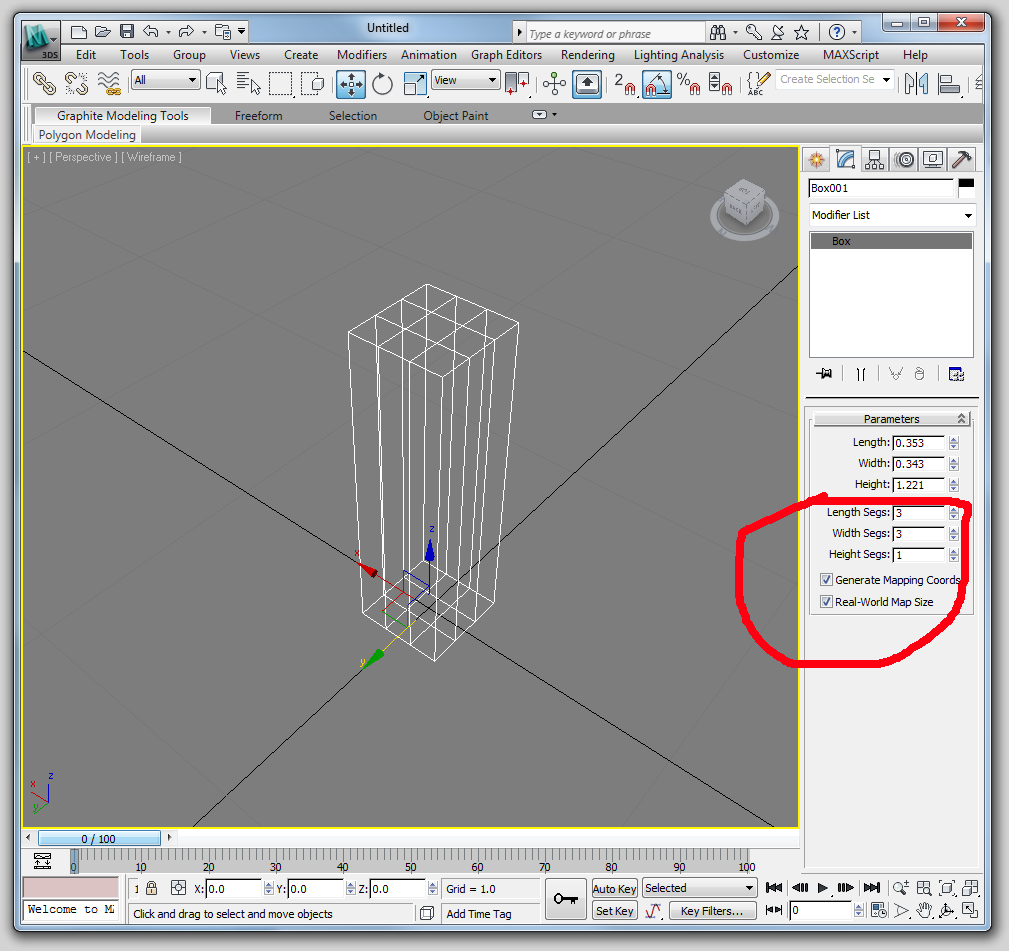
Since we don't have any orthographic reference images, there is no setup to do. To start creating the first sign, make a box primitive and give it 3 length and width segments.
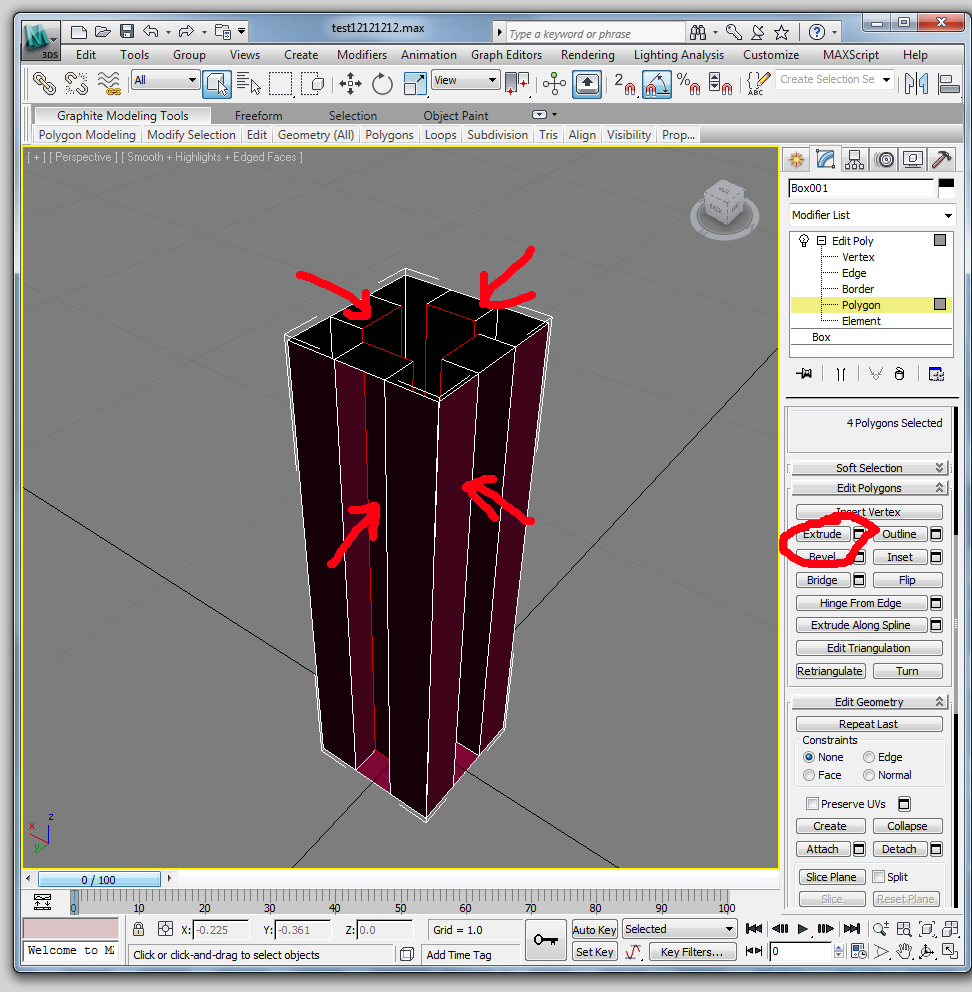
Convert the box to an editable poly, then delete the top and bottom faces. Next, extrude each of the 4 middle lateral faces with a negative value
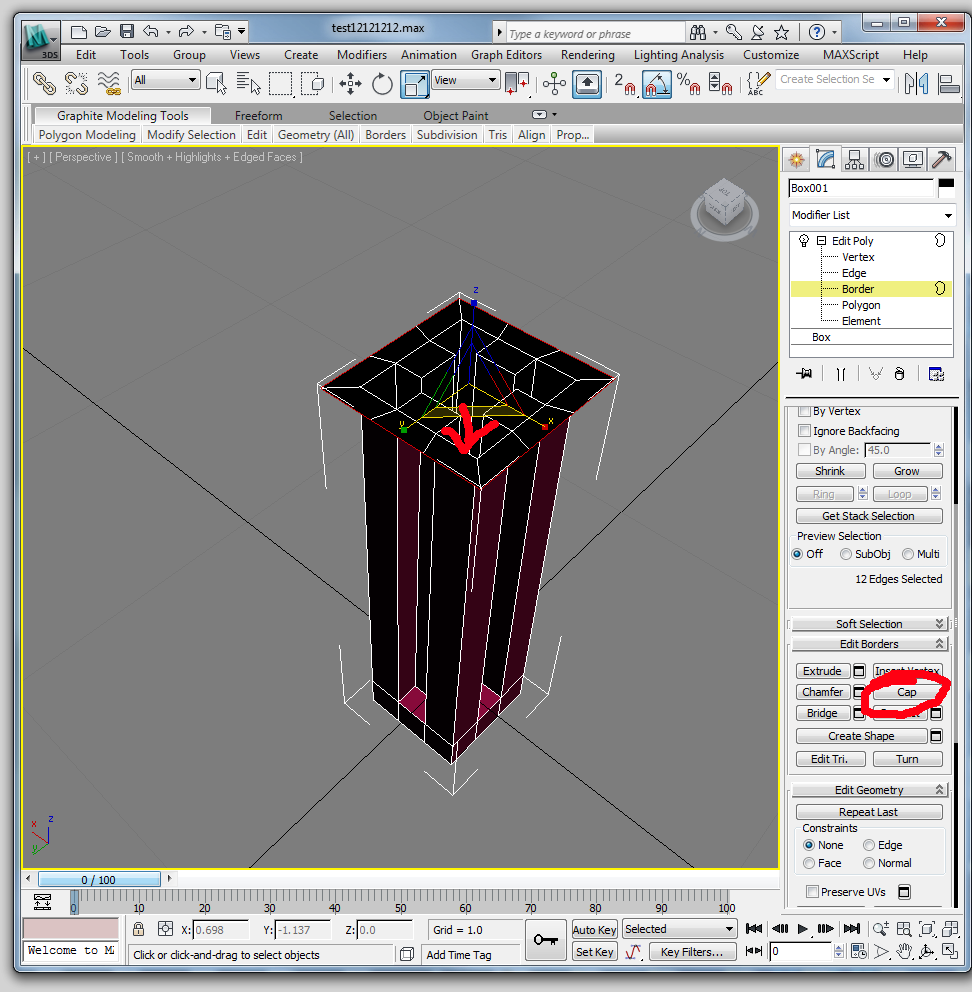
Cap the bottom edge of the object, then extrude it out a bit. Then, select the top edge of the object (it should be a rectangle), then hold down shift and scale the edge from the top view. This will create a new edge.
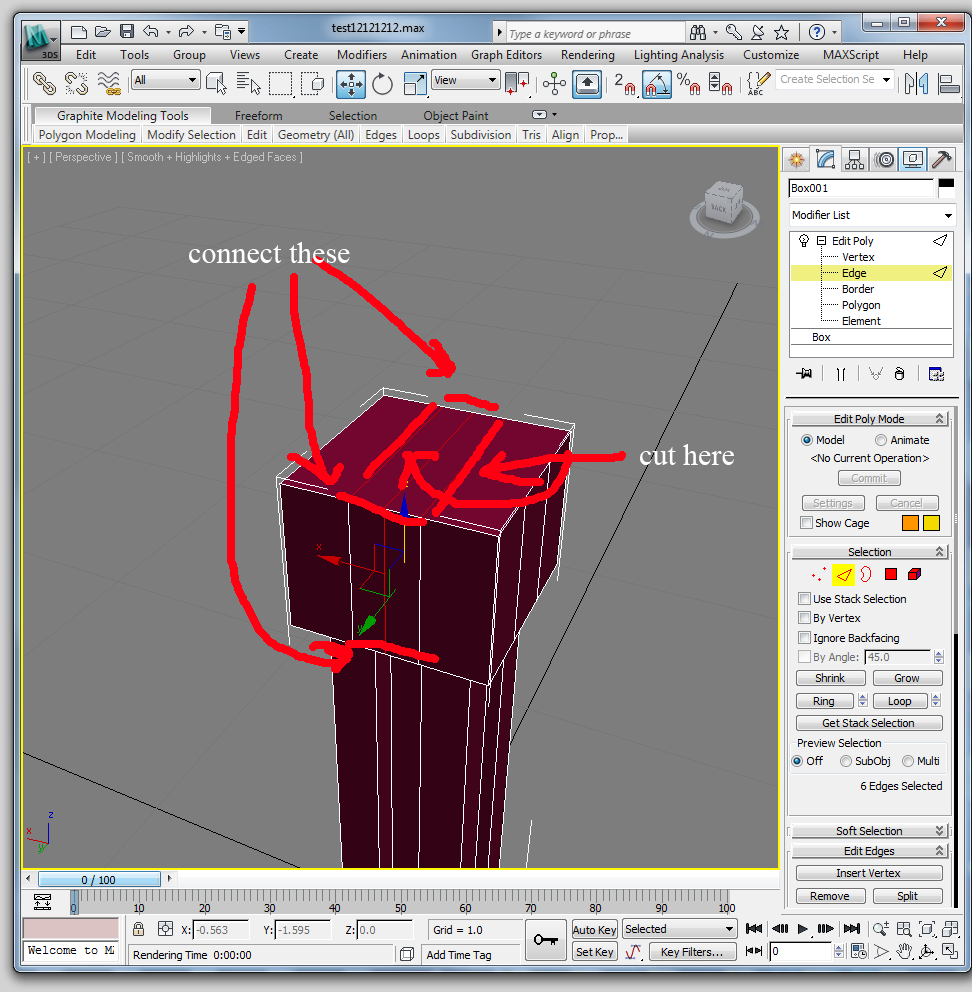
Select the top edge again, hold down shift, and drag it up. Drag through the middle faces and connect (you could also use slice or quickslice here, see image). Use cut to make edges between the vertices on the newly capped top surface that are not connected next to where you just connected/ sliced.

Grab the outer two sets of points, then drag them up a bit. Then, grab only the outer two lines of points (ctrl+drag to add to a selection), and move them up further to create a notch.
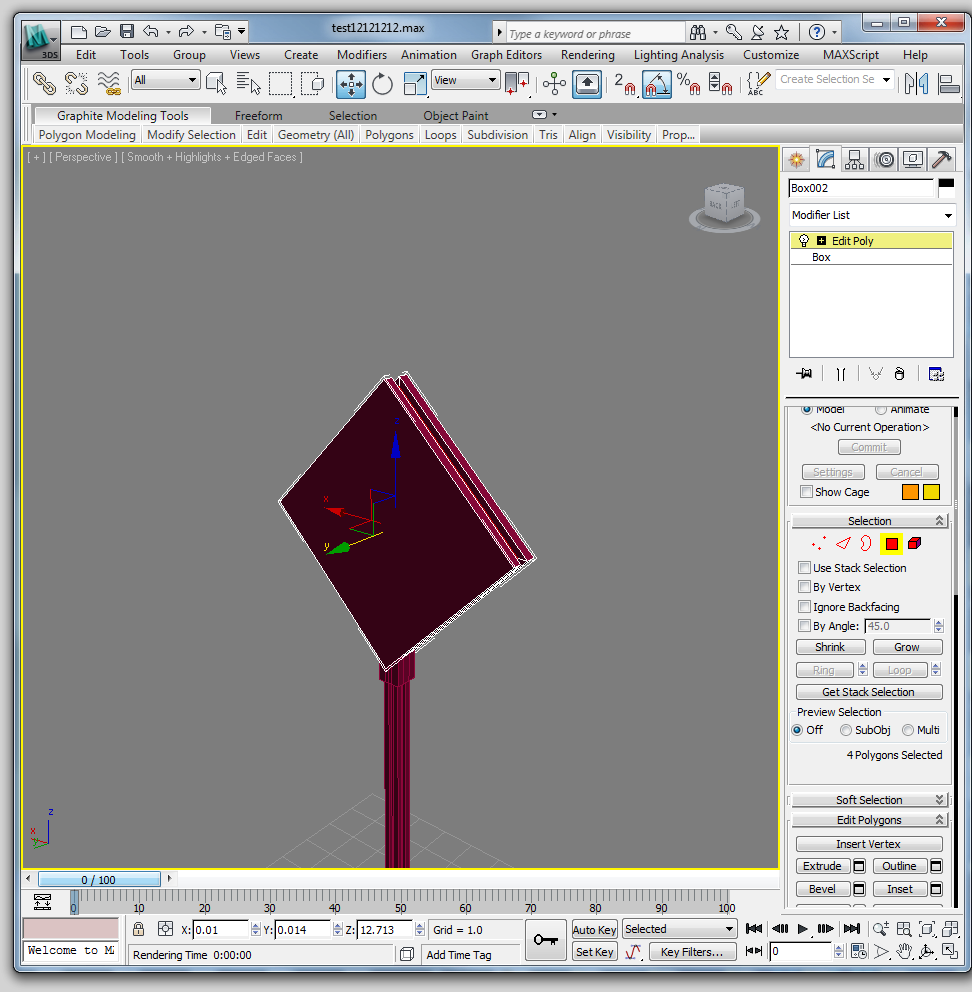
The sign itself is a rotated box with the middle of three lateral edges extruded. When you make this extrude, select 'local normals' instead of 'group normals.'

The other sign can be created through deft use of the extrude and connect tools (you can start with part of the bottom bar and extrude to follow the form of the sign). You can use a reference plane based off of the 'parking1' image if you wish. You will probably want to use the symmetry modifier mentioned in last week's assignment. When making the owl sign at the top, it is useful to know how to make an arc. To do this, go to create-> splines -> circle (or arc). Click on this spline and expand the 'rendering' submenu under its properties. Check 'enable in viewport' and change the setting 'radial' to 'rectangular.' This causes the spline to be shown as a blocky tube. When you are done modeling the signs, UVW map them using crosswalk_texture and parking_texture so that they look like the reference images.