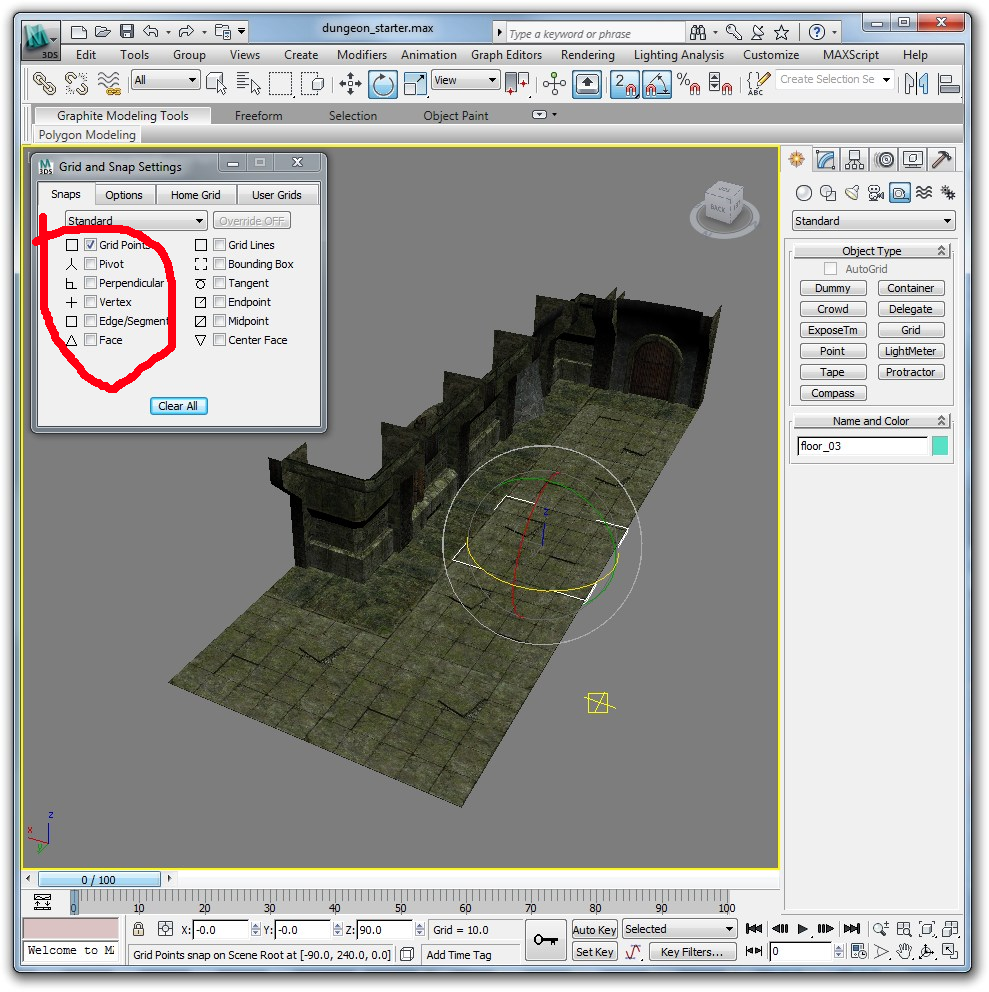
Open dungeon_starter.max. Notice how the pieces all fit together. They were built on a grid, so we want to keep them on the grid. Turn on grid snapping and rotate snapping. Right click on either and make sure 'grid points' is under 'snaps' is checked.
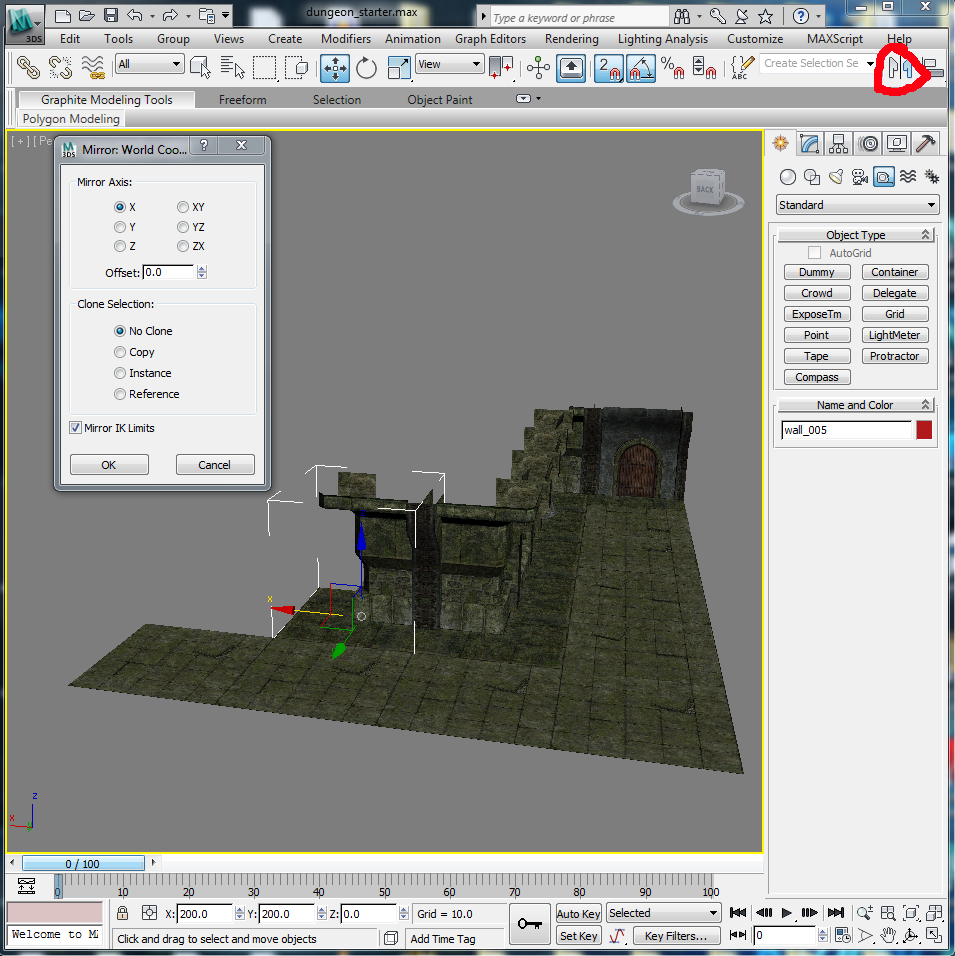
Note how you can use shift + drag to clone wall and floor pieces. If you need to flip a piece, you can use the mirror tool in the upper right.

Keep creating new sections until you have a basic layout that you like (it should end up more complex than the example). Try to avoid repeating segments close to eachother. If you want, you can edit the geometry of some of the parts to create even more variety.
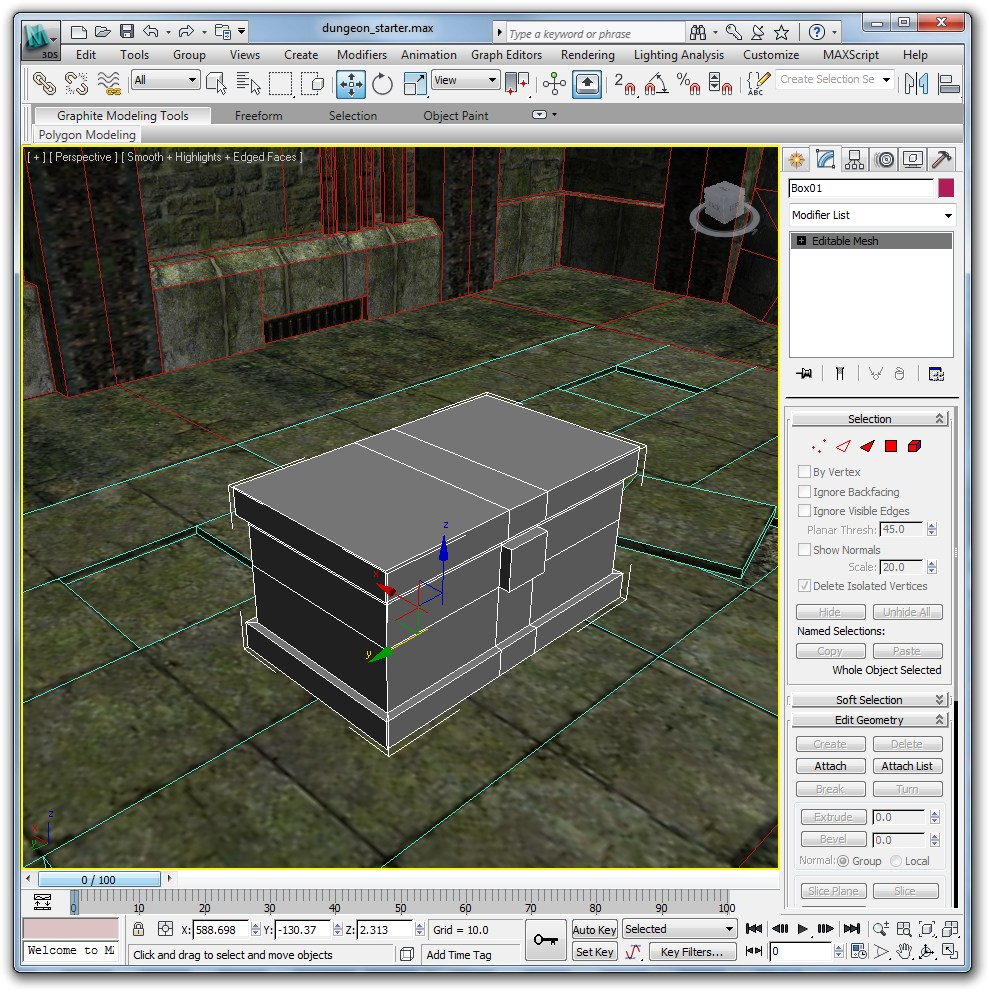
Now we need to add some doodads to make the space more interesting. Open up 'chest_model' and begin modeling the treasure chest. This can be done as a series of extrusions of a box. Try and keep the polygon count low, and avoid intersecting or overlapping faces. Don't try to build it out of a bunch of smaller objects.

UV map the chest using the 'chest' image in the same way we have been doing. Take care not to distort the rivets, as this will be very apparent visually.
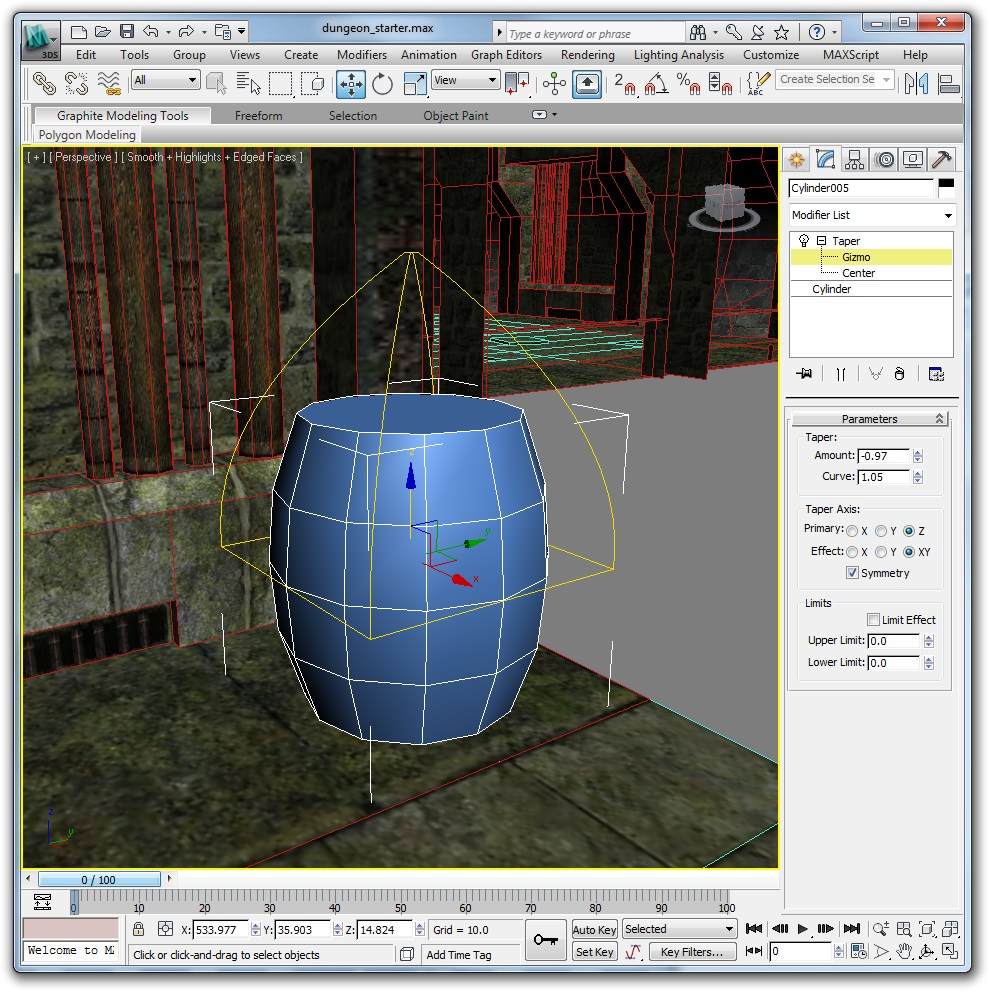
Now we need to model the barrel doodad. First, create a cylinder. Keep the number of segments fairly low; we are trying to make the textures do the bulk of the work here. Apply a taper modifier, then set the parameters to something similar to what is shown. Move the gizmo of the taper modifier to the vertical center of the barrel.
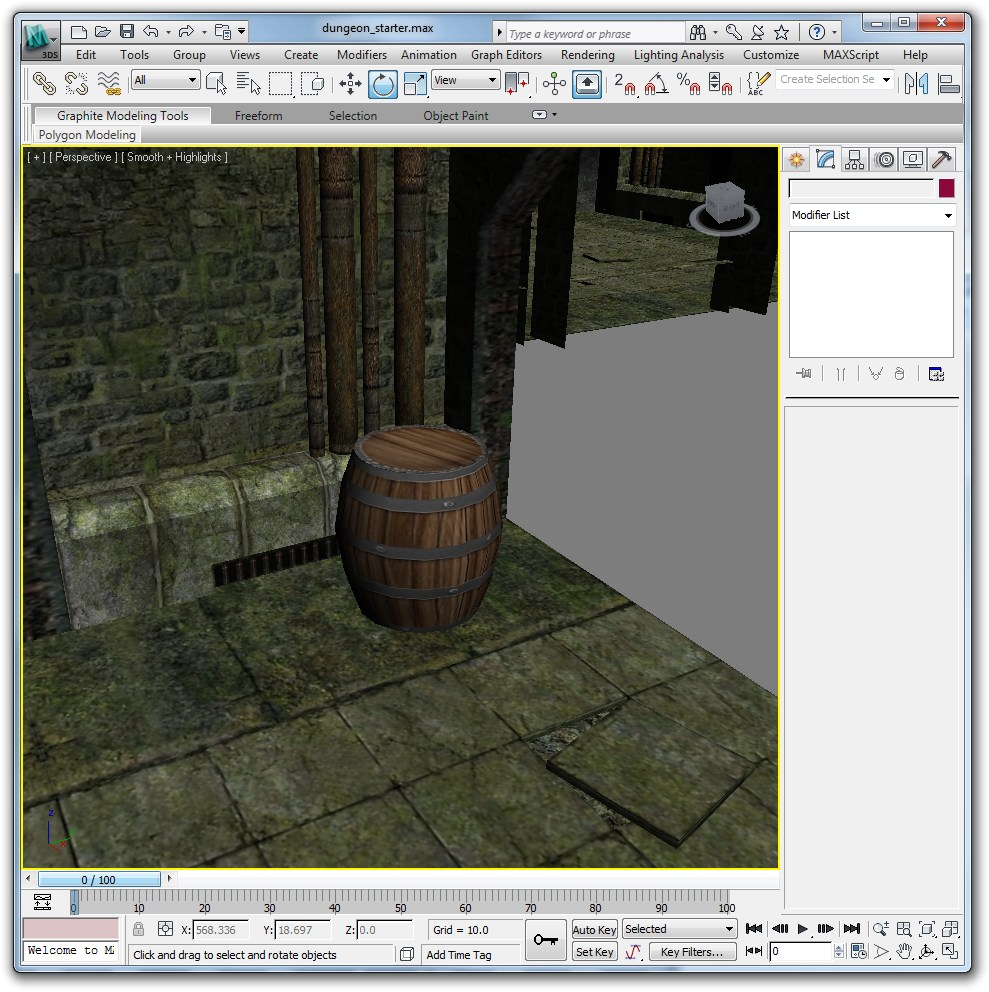
UV map the barrel in the same fashion. If you find it useful, make your initial mapping a cylindrical map instead of a box map. When you are finished, distribute the doodads throughout your level.. If you have time you can create additional detail for the level.