
BIOE 451/452: Engineering and Communication Cycle 2
These materials were developed for BIOE 451-452 by Maria Oden, Deborah Ausman and the Cain Project in Engineering and Professsional Communication
Developing a solution
A pdf document containing this information can be found here.
This page provides an overview of the communication documents required for Cycle 2. Please refer to the Overview of Bioengineering Design and Communication page for background on the engineering and communication process in BIOE 451/452.
About engineering and communication cycle 2
In Cycle 2, your team will exploit the shared knowledge base created in Cycle 1 to develop a specific, well articulated solution to your design problem. During this cycle, you will also initiate a sequence that will be repeated until your project’s completion: You will build part of your design, test it, and refine your plans based on the results. New documents in Cycle 2 will provide a written record of your testing and results, drawings of your prototype, and lists of parts and purchases relevant to your project.
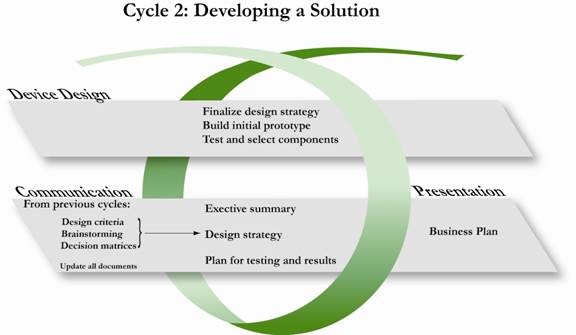
Graphical Representation of Cycle 2 in the Design Development and Documentation Process. Note that not all deliverables are listed- only the primary ones. See the table below for a complete lit of deliverables for Cycle 2.
The build/test/refine sequence also applies to your communication products. Changes in your design may require you to explore different literature sources, modify your problem statement, or tweak your initial design criteria. During Cycles 2, 3, and 4, you will begin transforming documents into the sections that will eventually constitute your final report.
The culmination of Cycle 2 is the design strategy document. This document describes in detail the design you plan to undertake, the process you used and choices you made while developing this plan, and the timelines and resources necessary to complete your project. You will also provide a plan for testing your design to ensure it meets the parameters defined in your design criteria.
Revised documents assessed again in Cycle 2 |
|
|
|
|
|
|
Note: You will also receive a format and organization grade assessing the quality of your team’s documentation management.
Why you do it
The binder cover helps your team by:
- Serving as the first impression for your project
- Providing an identity or brand for your team
- Formalizing and protecting your written documentation
How to prepare the binder cover
Design a single-page cover that, in addition to any graphics or logos, also includes the project title, team name, team member’s names, sponsor’s names, and date of submission. Consider using a descriptive, eye-catching graphic to add interest. Try to design a cover that reflects your team’s personality and goals, while looking professional.
Additionally, you should label the spine of your binder so that your team and the academic year can be identified if it is on a bookshelf (e.g. Team Phoenix, 2007-2008)
How to revise the binder cover
The binder cover will be graded in Cycle 2 as part of the Document Management rubric, but you can revise and update the cover at any time as your project progresses.
Documentation Management Rubric
Why you do it
The executive summary helps your team
- Summarize your project’s status at various stages of design work
- Orient your audience to the aims, methods, current status, and implications of your project
In your coursework, your grader has a responsibility to read your entire report. No such guarantee exists in the workplace. Most readers are interested in the essential facts about your project: why you undertook it, how your approach improves on current methods, how you built and tested your device, and the results of those tests. The executive summary provides this information in one place, enabling your readers to get your “gist” before (or instead of) reading your entire report.
How to prepare the executive summary
The executive summary provides an overview of your project as it stands at the time the summary is written. It should be on page long. Organize your summary to answer the following questions:
- What problem are you trying to solve?
- Why is solving this problem interesting or important?
- How will/does your design solve the problem? How will/does it work and why did you choose this specific approach over other options?
- How will/did you validate your design? What surprises, new discoveries, or anomalies have/did you encounter? What do your performance results suggest about the solution you proposed?
- Is your work complete? If so, what recommendations do you have for improving or building on your design? If not, what do you plan to do next or what recommendations can you make to others that might conduct follow-up studies?
See sample executive summaries by consulting Executive Summary Accelerator #1.
How to revise the executive summary
The executive summary should be updated every time you submit documents for review. In the early stages, you will forecast work you plan to do. As you move through Cycle 3, the executive summary will provide results and interpretation. In your final report, the executive summary will summarize your entire project. Remember to check verb tenses as they are likely the change as you progress through your project.
Why you do it
The design strategy will help your team:
- Formulate and describe an actionable strategy—including objectives, rationale, and methods—for completing your project
- Justify your choices and selections to give your project credibility
- Specify the initial prototype and design blocks and lay out a plan for allocating/acquiring resources (people, time, parts).
- Determine how to address regulatory requirements (such as FDA approval) that may impact the development and launch of the device.
- Secure approval and guidance on its project from manager/sponsor and set expectations for reporting project status and tracking changes that may occur during building and testing.
Preparing the design strategy
The design strategy document details exactly what you plan to build, how you arrived at the choices you selected, and how you expect the final design to meet your project’s design criteria. The document will include your detailed design criteria, brainstorming ideas, and decision analyses.
The design criteria, brainstorming/ideas for solutions, and decision matrices all support the development of the final strategy. The design strategy document should not fully detail all of this supporting material, but it should summarize the alternatives you considered and the methods you used to arrive at your final strategy. It is often tempting to provide this information chronologically (“First we tried A, but that didn’t work. So we tried B.”) Instead, try to begin your design strategy document with the strategy you chose. Then, in ensuing sections, break down your strategy into components and discuss how you arrived at each one.
The design strategy is also the first time the team will consider the impact of regulatory requirements on its project. Teams will fully research the regulatory requirements relevant to their project. FDA approval, in particular, affects many of the designs developed in bioengineering design. You can find information on the FDA approval process at http://www.fda.gov/cdrh/devadvice and in course lecture notes. The design strategy should detail how the team will address regulatory requirements (or, in the case of designs that don’t require FDA or other regulatory approval, provide detailed justification for this conclusion).
Decision matrices, cost calculations, block diagrams, CAD drawings, flow charts, sketches, circuits, and graphs are essential in the design strategy document, as they help readers visualize your solution and candidate solutions.
To learn more about working with figures, consult Figure and Diagram Accelerator #1: Tips for Working with Figures.
You will need to provide a plan for securing FDA approval as part of your implementation plan. You can find information on the FDA approval process at http://www.fda.gov/cdrh/devadvice and from course notes. If your device will not require FDA approval, you must include a detailed justification for this conclusion.
.
How to revise the design strategy
The document submitted in Cycle 2 will summarize your team’s initial strategy for your design. The document will form the basis of your final design documentation in Cycle 3 and Cycle 4 and should reflect any changes in your strategy that you make during the building and testing cycles.
Why you do it
The plan for testing and results will help your team
- Demonstrate to managers/sponsors the measurable criteria by which you will judge success or failure
- Assess the efficacy of your solution
Your project has been organized to solve a specific problem. Your tests will determine how well your solution works by testing the device against the design criteria upon which it was based. Results should be quantifiable and provide actionable information on the design you have developed.
How to prepare the plan for testing and results
The plan for testing and results document should describe the tests you plan to run, why you chose these tests, and what they will reveal about your design. You should demonstrate the types of tables and graphs you expect to include in the results section of your final report. For example, if you plan to run a series of tests that measure temperature in your device over a period of time, you should include a graph of Time vs. Temperature and indicate the expected length of the test and the different conditions under which you plan to run the tests. This will help you organize your testing to include the specific tests that will provide you with the best evidence of the efficacy and performance of your prototype.
Avoid formatting this document as a list of tests. Your final report will use narrative form to describe the tests you actually ran, your rationale for selecting them, and the results, perhaps with subheadings to break down the tests; using this format now will save you time when you draft your final report.
You will likely not have any results to report until Cycle 3. See How to revise the plan for testing and results for information on reporting your results.
How to revise the plan for testing and results
The testing and results documentation will be graded in Cycle 2 and in all subsequent cycles. The initial document will outline planned tests. As your team performs the tests, you will revise the document to summarize results, interpret them, and propose additional tests to perform. The record of your testing and results progress will serve as the basis for the results section of your final report.
Collect results in the most convenient way available to you. Many tests can produce reams of data. Keep the raw data in your binder, labeled appropriately so that it can referenced as an appendix if you think your readers will want to see the actual results.
Most readers, however, will not need to see the raw data. A representative portion or subset of data usually suffices to highlight key points or conclusions. Use graphs or tables to summarize findings, along with a one or two paragraph overview of the findings and your interpretation of them.
To learn more about working with figures, access Figure and Diagram Accelerator #1: Tips for Working with Figures.
Why you do it
The invention disclosure form helps your team
- Become familiar with the official paperwork associated with device creation in a university setting
- Prepare for presenting your work at a conference or other public forum
Rice University ultimately owns all inventions created by Rice students, faculty, or staff. As a result, all inventions, including the devices created by BIOE 451/452 teams, must be disclosed to the university so that it can decide whether to pursue a patent on the invention. Such forms are also common in industry—anywhere that an organization needs to protect its intellectual property.
How to prepare the invention disclosure form
Download the form from the Rice Office of Technology Transfer (OTT) web site. The instructions are self-explanatory. In providing information, organize your content to best convince the OTT that your idea is worth pursuing. Include pertinent details from your design strategy and any results or conclusions that demonstrate the utility of your device.
Your team should consult Dr. Oden when you are deciding who to include as inventors of your device and what percentage contribution you should assign to each inventor. Dr. Oden will have the ultimate decision if conflicts that the team cannot resolve arise.
How to revise the invention disclosure form
The invention disclosure form will be graded in Cycle 2. You will continue to revise as needed for submission to the OTT. You should discuss with Dr. Oden and your mentors whether and when you should actually submit the disclosure to the OTT. If you submit the form to the OTT, include the final submitted form and the OTT’s response in your binder.
Why you do it
Your initial CAD drawings will help your team:
- Visualize how the various components in your design work together and interrelate
- Record progress and changes to the design
- Provide visual assistance to others seeking to understand or reproduce your design
How to prepare the initial CAD drawings
In your final report, you will include CAD drawings in the body of the report, in the Appendix, and in the digital SharePoint archive of your work. The drawings in the final report will encompass a subset of nice three-dimensional renderings of your device and its essential components. Two-dimensional, labeled, and dimensioned drawings of each component should be included in the Appendix. You will also include a more extensive set of three-dimensional renderings of your device in the appendices. Future teams, your company, and your sponsors may all need to use these drawings to recreate your device, so create the CAD models with this in mind.
The initial CAD drawings in Cycle 2 enable you to begin the process of developing these drawings and receiving feedback on them. You will use some of them in the design strategy section to describe your design concepts and your final selected approach. You will continue to update the drawings as you modify and improve your final design.
All drawings should be fully labeled and captioned. If you include a figure in the body of your report, make sure to also refer to it in the text. If you refer to a portion of the device in the caption or the text, that portion should also be labeled in the drawing.
How to revise the initial CAD drawings
You will continue to add to, improve, or modify the drawings as your design is revised.
List of Purchases and Expenditures
Why you do it
The list of purchases and expenditures helps your team:
- Manage budget and track orders to avoid delays
- Develop a record for justifying additional costs or reassuring managers/sponsors that you are staying within budget.
In industry or an academic lab, you will be expected to adhere to a strict budget in accomplishing your work. All design projects in BIOE 451/542, therefore, have a budget associated with them. Keeping an updated list of your purchases and expenditures will keep your project on track and on budget while providing a record for managers/sponsors of your work.
Preparing the list of purchases and expenditures
- Use a spreadsheet to track all team purchases and expenditures from the beginning of your project. Don’t forget to include shipping and other payments for services rendered to your team.
- Include enough detail in your list so that you or another person could use the list easily reorder or acquire items (e.g. vendor, part number, cost, notes)
- Include ALL parts purchased whether you ultimately use them in your design or not.
- The total amount spent should match the records that course instructors have for your team. Track these amounts yourself—course instructors and design staff will not guarantee that they will pull purchase files for you so that you can create this list late in year.
- Should your project be associated with multiple departments, be sure to track which department paid for a particular item.
Revising the list of purchases and expenditures
Continue to update the list while working through Cycles 3 and 4. You will use this list to create your parts list and assembly instructions in Cycle 3.
Purchases and Expenditures Rubric
Links to other Cycle Web Pages:
Cycle 3:Implementing and Testing
Cycle 4:Finalizing and Presenting the Solution
![]()
© Rice University 2006, 2007, 2008, 2009, 2010