
BIOE 451/452: Engineering and Communication Cycle 3
These materials were developed for BIOE 451-452 by Maria Oden, Deborah Ausman and the Cain Project in Engineering and Professsional Communication
Implementing and testing
A pdf document containing this information can be found here.
This page provides an overview of the communication documents required for Cycle 3. Please refer to the Overview of Bioengineering Design and Communication page for background on the engineering and communication process in BIOE 451/452.
About engineering and communication cycle 3
In Cycle 3, the documentation requirements diminish as your team focuses on implementing, testing, and refining your design. Most of the documents created in earlier cycles already provide the primary motivation and explanations of your project. But just as your tests may require you to refine your design, your design changes will require you to rethink how you discuss your design with others. In Cycle 3, you will continue to update key documents to reflect your current status.
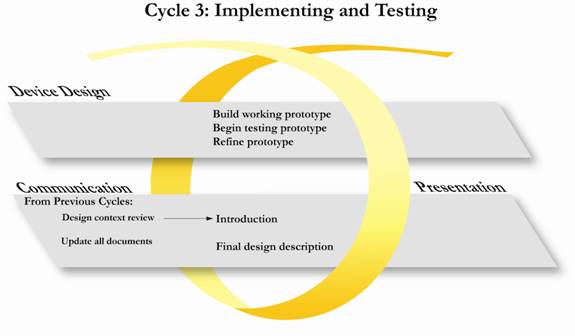
Graphical Representation of Cycle 3 in the Design Development and Documentation Process. Note that not all deliverables are listed- only the primary ones. See the table below for a complete lit of deliverables for Cycle 3.
You will work primarily on two new documents in Cycle 3: the final design description and the introduction to your final report. You will base the introduction to your final report on the design context review completed in Cycle 1. The final design document will use your final design decisions and CAD drawings to provide an overview of your design. Remember: The design is the culmination of all your work over the past six months, and the final design document is your opportunity to share what you created and how it works.
Revised documents assessed again in Cycle 3 |
|
|
|
|
|
|
Why you do it
The introduction helps your team by:
- Providing essential background to readers so that they will understand the context and motivation for your project
- Placing your work in the context of other work
- Ending with a clear problem statement that clarifies the purpose of your work and with a summary that forecasts for readers what they will learn if they read the remainder of your paper.
How to prepare the introduction
Your design context review contains detailed information on your project’s background and problem statement. You will draft the introduction by modifying the design context review.
The design context review and your introduction play different roles in the design communication process. Your design context review was intended to convince managers and sponsors that your project was organized around a specific problem that was worth solving. You had not yet decided on a specific design strategy, let alone built or tested components. The focus was the problem.
Your introduction, on the other hand, is part of a larger report. It is setting the context for and introducing the work you have done. Your aim with the introduction is to interest readers in your work and inform them of its importance. You will make many of the same points that you made in your review, but may incorporate less detail and remove background information that ultimately was irrelevant to your final project.
Introductions tend to include the following components
- The first few sentences (or first paragraph) signal the focus of your report and engage the reader’s attention. Avoid clichéd or hyperbolic openings, or openings that dryly state the subject of your paper. Try to lead with a statement that broadly invites readers into the situation that your design will be impacting.
Ex: A team developing a portable pulse oximeter for treating children in Africa might start with the following sentence: A leading cause of pediatric mortality in developing nations is respiratory failure [ref].
- Several paragraphs reviewing the various aspects of the situation that together lead to your specific problem statement. Most introductions start with what is known about a topic, move to discuss what is unknown or in question, and end with the specific problem that your design addresses. You will likely follow the same organization that you used in the headings or sections of your design context review, though you may not go into as much detail as you did in that longer document.
Ex: A team developing an automated fracture fixation frame will need to discuss the following points to put its problem statement in context:
- Review of current fracture fixation theories
- The current state of the art theory and how it has been implemented in a device (the Taylor Spatial Frame)
- Evidence supporting the implementation of an alternate theory
- At the end of the introduction, readers expect to find a concise forecast of the design work that you will be describing in the remainder of the final report. This forecasting statement or paragraph does the following:
- States the specific problem your design/research explored (your problem statement)
- Highlights unique aspects of your solution
- Reviews, briefly, your most important findings (and why they are important)
- Provides a roadmap for the rest of the paper (usually by reviewing the sections that follow the introduction)
How to revise the introduction
You will receive feedback on the version of the introduction that you write in Cycle 3. Continue to revise the introduction as you develop the final report.
Why you do it
The final design helps your team:
- Describe its final design in both words and illustrations that can be used to supplement and support the development of other materials, such as the parts list, assembly instructions, and safety and users’ manuals
- Orients readers to the design so that they can assess its function and evaluate testing results
How to prepare the final design section
Whether your design is a physical structure, a device, a software algorithm, or a methodology, the end result of your design work is a tangible product. The final design description tells your readers what exactly you built during your two semesters in bioengineering design. This description should be detailed enough to guide someone wanting to reproduce your work. It should also be organized to help someone understand how your design works.
This section builds on the design strategy document. Your design strategy document generally describes how you intend to solve your chosen problem. The final design document provides details on exactly how you implemented that solution.
It often helps to let a fully labeled illustration or illustrations of your final design serve as an organizing foundation for your final design document. As you write your document, refer to your illustration and break the illustration into components as you discuss specific aspects of the design. Your text should start by broadly describing the entire system and its key subcomponents or subsystems. Explain how this particular organization of systems and components addresses your design criteria—in other words, how does everything work together to solve the problem motivating your design?
After orienting readers to the high level concept of your design, begin providing details on specific components and subsystems. You may not need to discuss every detail of your system; focus on those that are integral to the operation or the success of your solution. Remember that your objective is to describe the design and how it was built to achieve the goals you set in your design strategy.
You may have made a number of different choices before settling on the final design, and you may make many more changes before presenting your final solution at the end of the semester. It is often tempting to describe all of these false starts and wrong turns in your report. The final design, however, is not the place to write a chronology of your project. Reserve the chronological details for your weekly updates to the instructor or, if choices made turned out to be critical to the performance of your solution, you should revise your design strategy, discuss them as you analyze the results of functional tests, or incorporate the information in the recommendations in your final report.
Learn more about working with figures by consulting Figure and Diagram Accelerator #1: Tips for Working with Figures.
How to revise the final design
The final design is the culmination of all of your work in this course. This description of what you have built will be as the most important section of your final report.
As you complete your design, you should include high quality photographs of your final device. These are particularly interesting if you can show the device in action or during testing.
Learn more about creating the final report by consulting the BIOE 451/452 Engineering and Communication Cycle 4 Overview
Single Slide Project Description
Why you do it
The single slide project description helps your team
- Narrow its focus and objectives to strong, readily understandable points
- Articulate a set of talking points that team and managers/sponsors can use to accurately describe the team’s project to interested parties or potential stakeholders
How to prepare the single slide project description
You never know when you will meet someone who can assist in the development or commercialization of your device. The single slide project description prepares you to strongly and succinctly describe your project on the fly.
You will present your elevator pitch on a single PowerPoint slide that can be used by your team and by the course instructor. Your slide will provide the instructor with an easy way to summarize BIOE 451/452 projects to colleagues and others interested in the course. In addition, your slide, along with your mission statement, will be posted on the course web site to showcase the work done by students in BIOE 451/452.
Your slide should include the following content:
- A descriptive title.
- Your problem statement or primary goals identifying the key need for and purpose of your device.
- Information how your device solves the problem—what it does better, what makes it interesting, how it meets the need. This should probably be done graphically.
- Pictures or illustrative graphics relevant to your project.
- Rice Logo, department, team members, and team name and/or logo.
How to revise the single slide project description
You will submit the slide for a grade in Cycle 3 and will revise it to incorporate the final work on your design in Cycle 4.
Examples of Single Slide Project Description can be found here.
Single Slide Project Description Rubric
Parts list and assembly instructions
Why you do it
The parts list and assembly instructions help your team
- Track parts used in design construction so that they can be ordered by the team and, ultimately, by potential customers or users
- Develop instructions that other can use to assemble or build the design
Preparing the parts list and assembly instructions
The parts list will be just that: A list or table of the parts actually used to create your final design. The purchase list you have been keeping includes everything your team purchased—use this list as a resource for the parts list, which only includes parts actually used to complete your design. Be sure to update the purchase list in each cycle as well. You will also need to include parts that you didn’t purchase, but nevertheless used in your design. For all specialized parts, include a model number, the function of the part in the design, and enough identifying information or vendor information to help individuals attempting to recreate your design. Commodity items (screws, bolts, tubing, etc.) should be described in sufficient detail to make a purchase.
The assembly instructions should provide a sequenced set of steps to follow to put your design together. Use illustrations to minimize confusion and assist users whose first language may not be English. Take a look at the instructions that come with common household appliances, laboratory equipment, and even toys for examples of good (and bad) instructions. Consider having another team follow your instructions to determine places where your instructions might be inaccurate or hard to follow.
How to revise the parts list and assembly instructions
You will update and revise the parts list and instructions as you continue to build and finalize your design. These documents will become part of the users’ manual you will develop in Cycle 4.
Part List and Assembly Instructions
Your Web Page documentation will comprise two documents: a summary and a web page template.
First you will create a short 3-4 sentence summary of your project. This will be used to motivate a web browser to look at the subsequent document. Use the format in the example shown below.
Example Project Summary:
Diagnostic “Lab in a Backpack”
Team SouthFace: Jamie Lai, Junho Lee, Neel Shrikishen, Po T. Wang, Nick Taboada
As much of the world lives in rural communities, physicians are called on to visit areas that are reached by traveling on foot. Travel over rough terrain or a lack of resources such as electricity can further inhibit the doctor’s ability to provide even routine examinations in these rural environments. For a physician embarking on such a trip, gathering the appropriate medical equipment they need into an easily transportable pack is a tremendous challenge. The Lab-in-a-Backpack provides an efficient and cost effective way to deliver quality healthcare to remote areas.
You will complete the second deliverable for web documentation by filling out a template provided below. Select the appropriate template based on whether you are working on a Global Health Technology Project or a standard BIOE design project. Detailed instructions are included on the template: Read them carefully. To complete the template, you will provide a summary of your project background, design solution, and current status. You will also need some pictures of your device, logos from your sponsors and partners (many of these are included on the template) and your team logo for completing this project.
Web Documentation Templates:
Examples:
Links to other Cycle Web Pages:
Cycle 3:Implementing and Testing
Cycle 4:Finalizing and Presenting the Solution
![]()
© Rice University 2006, 2007, 2008, 2009, 2010